 JetLogix
10 Web Mail
Web Mail shows your own company mailbox inside JetLogix: you can read, answer, forward, organise and send e-mail without leaving the application. Every user sees only their own mailbox.
10.1 Connecting your mailbox
The first time you open Web Mail, JetLogix asks for the details of your mailbox (Your mailbox).
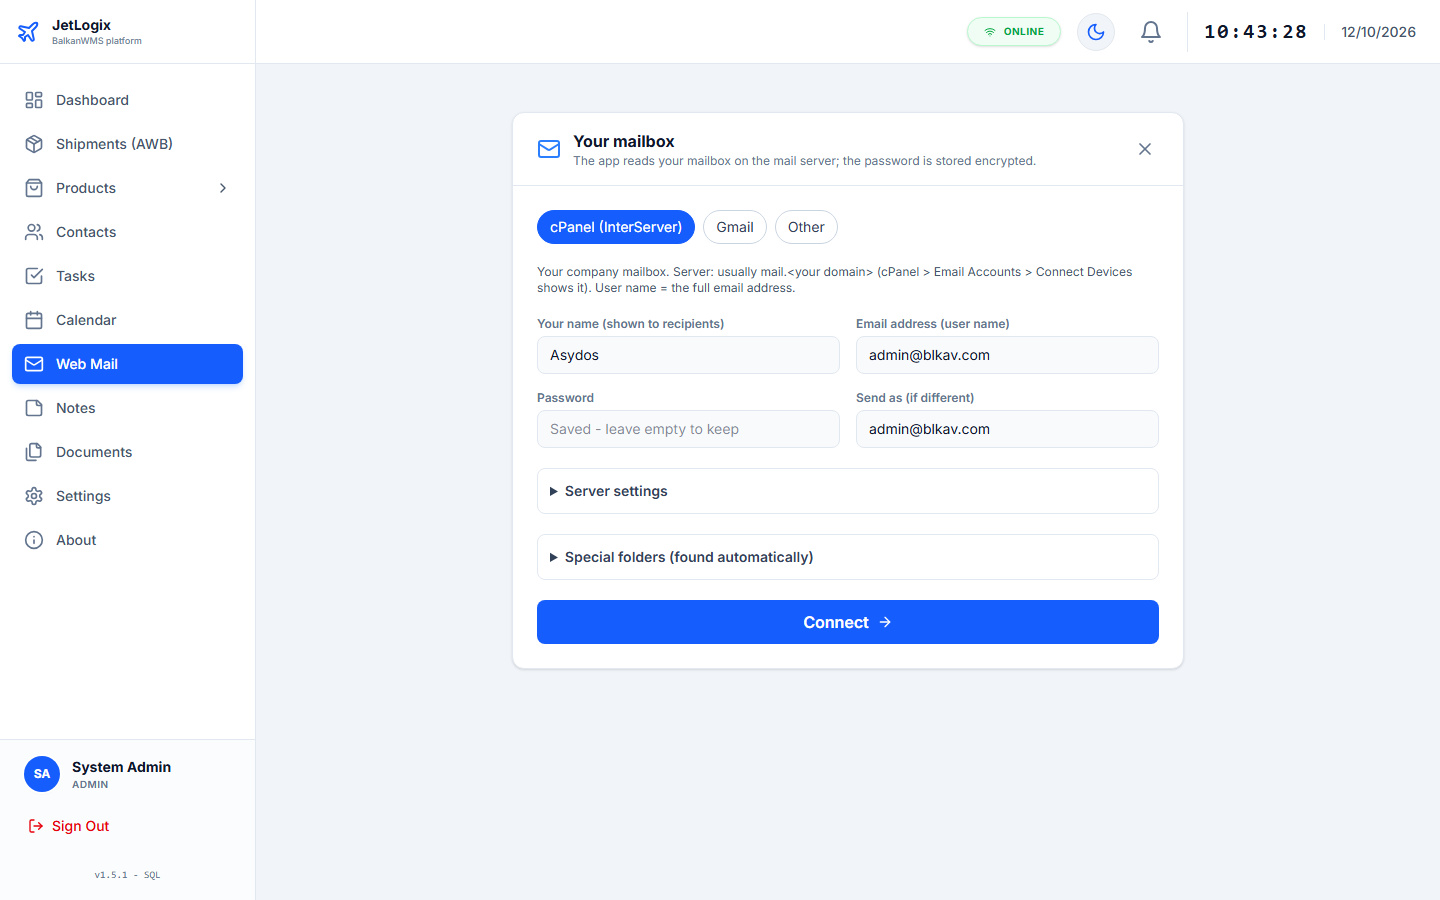
- Choose the kind of mail server:
- cPanel (InterServer): the company mail server. The server is usually
mail.<your domain>. - Gmail: a Google mailbox. You need an App password from your Google account and IMAP must be enabled.
- Other: any other mail server.
- Fill in Your name (shown to recipients), your Email address (user name) and your Password.
- If you send as a different address, fill in Send as (if different).
- Check the Server settings (incoming IMAP and outgoing SMTP server, port and security). For the presets they are filled in for you.
- Press Connect →. JetLogix tests the connection and saves the settings (Connected and saved.).
Note: Your password is stored encrypted on the server. To change the settings later, click your mailbox name at the bottom of the folder list. Leave the password empty to keep the saved one.
10.2 The mail screen
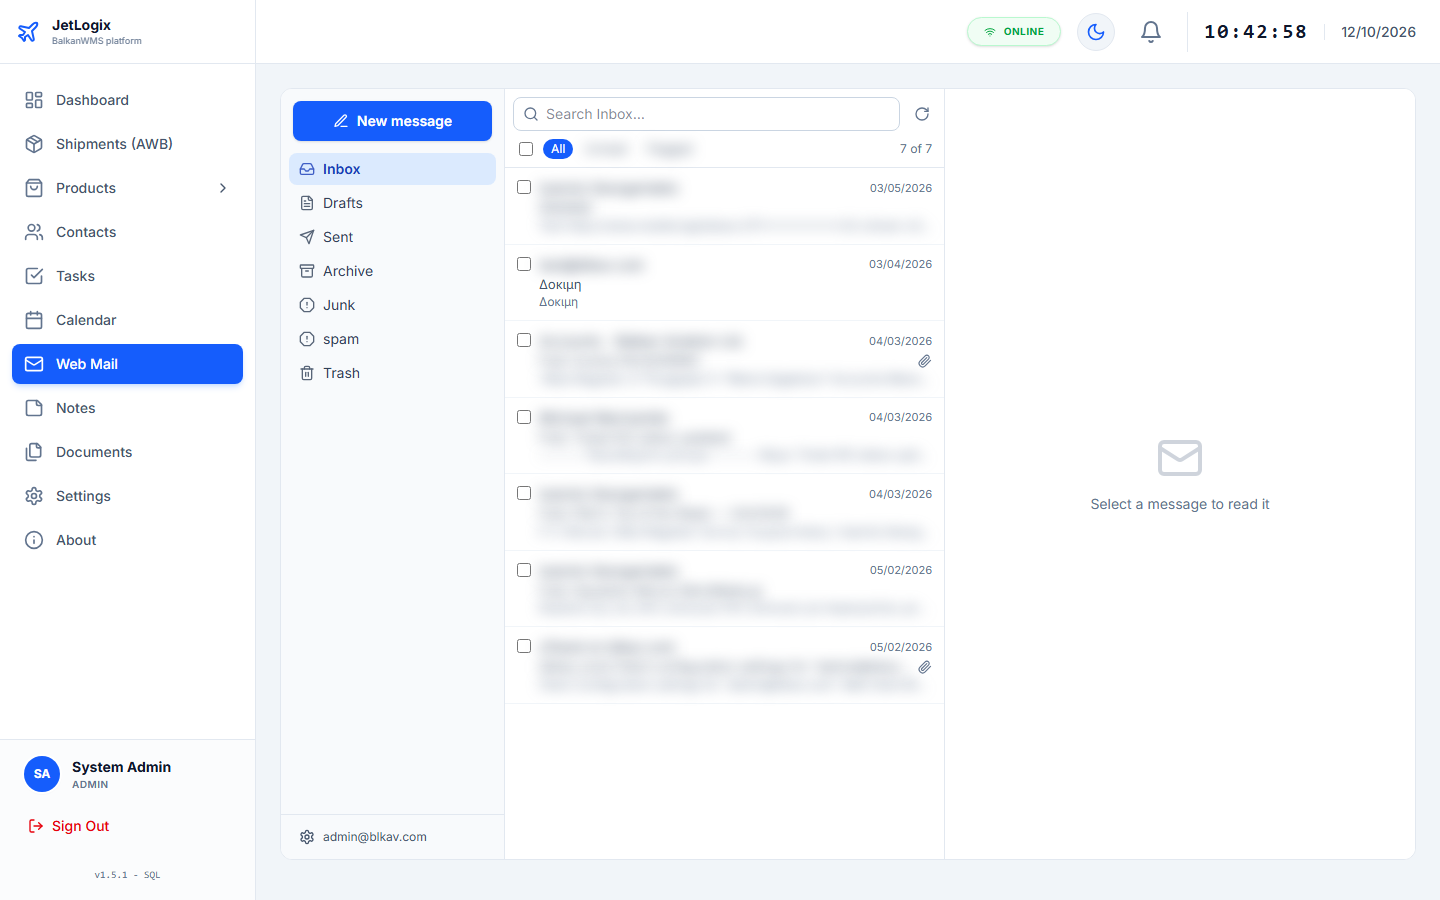
The screen has three columns:
- Folders: Inbox, Sent, Drafts, Trash and your own folders, with the number of unread messages. The New message button is at the top.
- Message list of the selected folder.
- Reading pane with the selected message.
10.2.1 Finding messages
- Search <folder>... searches the whole folder on the mail server.
- All, Unread and Flagged filter the list.
- The list shows 50 messages at a time; press Load older at the bottom for more.
- The list refreshes by itself every 2 minutes; press the refresh button to refresh it now.
10.2.2 Organising messages
- Tick one or more messages (
Shift+click selects a range, the box at the top selects all). Then use Mark as read, Mark as unread, Flag, Move to folder or Delete (to the trash). - Drag messages onto a folder to move them.
- Click the star of a message to flag it.
- In the Trash, delete removes the messages for good.
10.2.3 Reading a message
The reading pane shows the subject, sender, date, recipients and the attachments. Click an attachment to view it or download it.
Note: Pictures from the internet are blocked to protect your privacy. Press Show pictures if you trust the sender.
10.3 Writing a message
- Press New message, or Reply, Reply all or Forward in the reading pane.
- Fill in To (press Cc / Bcc to add copies) and the Subject.
- Write the message. Use the toolbar for bold, italic, underline and bullet lists.
- Press Send.
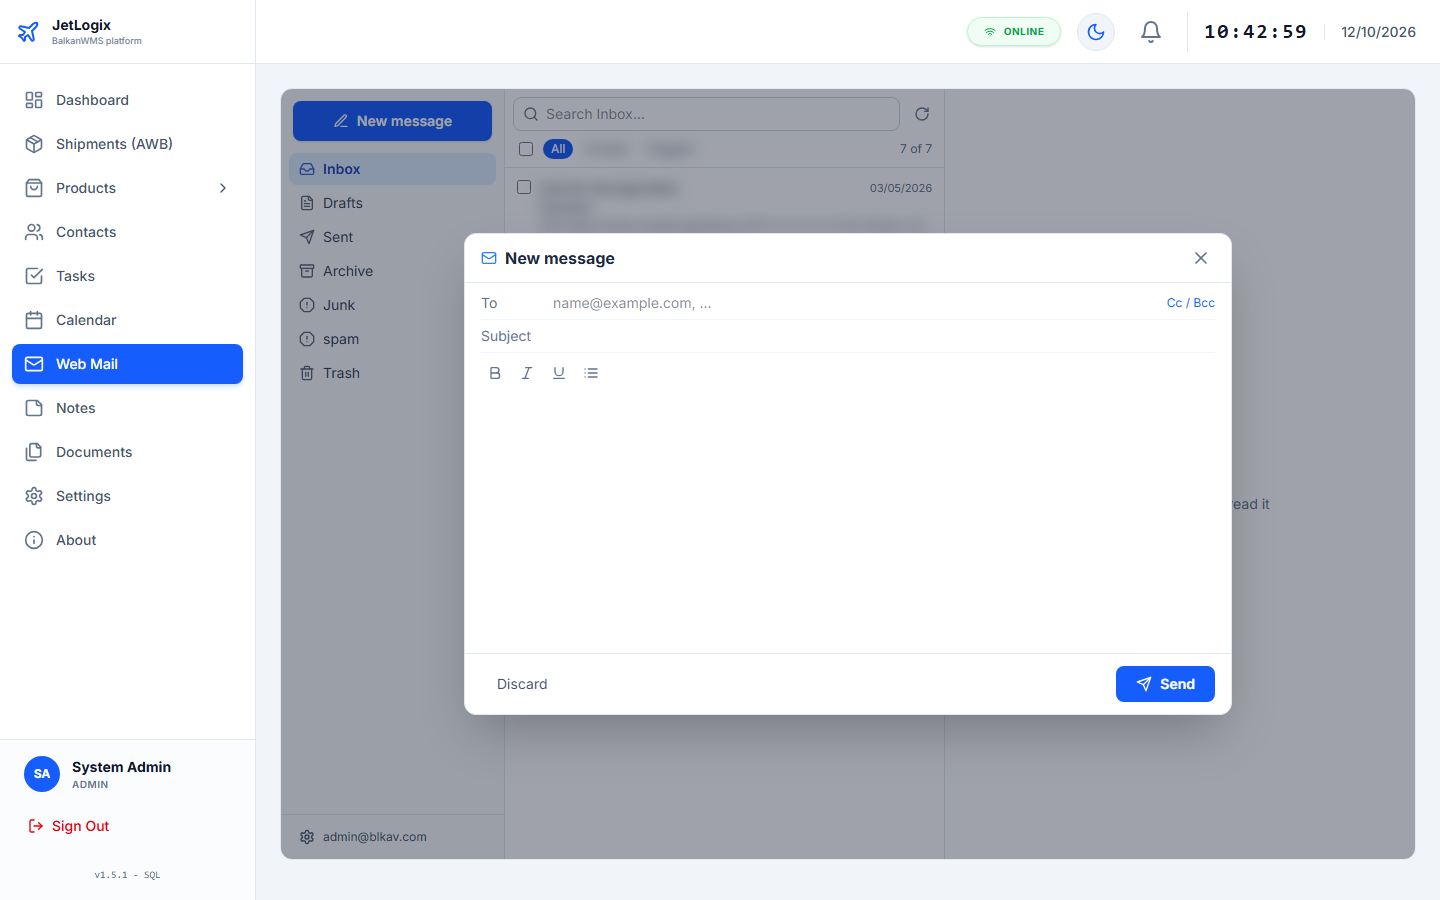
The message is saved in the Sent folder, and answers stay in the same conversation. Press Discard to throw the message away.
Important: Files cannot be attached to new messages in Web Mail yet, and the attachments of a forwarded message are not forwarded. Use your usual mail program (for example Outlook) to send attachments.