 JetLogix
7 Contacts and customer book
The Contact Directory holds the shippers, consignees and partners of the company. Contacts marked as customers or suppliers form the customer book, which fills in the shipper and consignee of shipments and the recipient of Geniki vouchers.
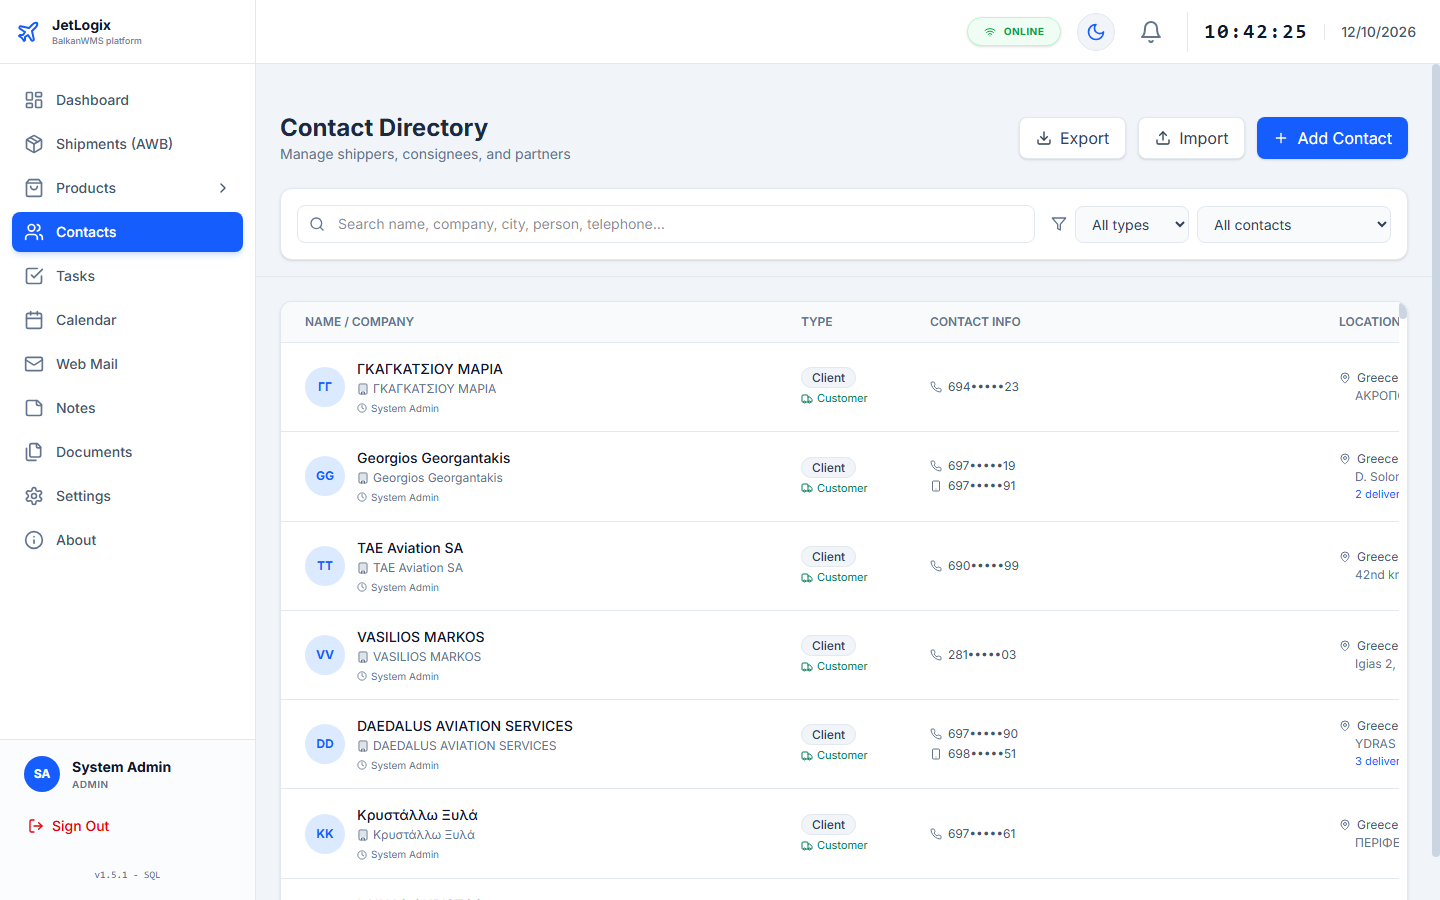
7.1 Finding a contact
- Type in Search name, company, city, person, telephone.... Every word you type must match; accents and upper or lower case are ignored. The delivery addresses are searched too.
- All types shows only one contact type (for example Customer, Supplier, Agent).
- All contacts filters by the use in shipments: Used in shipments, Customers, Suppliers or Not used in shipments.
| Column | Content |
|---|---|
| Name / Company | Photo or initials, name, position and company, and who changed the contact last. |
| Type | The contact type and, with a truck icon, the role in shipments. |
| Contact Info | E-mail (click to write a message), telephone and mobile. |
| Location | Country, address and the number of delivery addresses. |
| Actions | View Business Card, Edit Contact, Delete Contact. |
7.2 Adding or editing a contact
- Press Add Contact, or the edit button of an existing contact.
- Fill in Contact Name and Company Name (both required), and the other details: Job Position, Contact Type, Website, Email, Work Phone, Mobile Phone, Country, Full Address, Notes.
- Set the role in shipments and the delivery addresses (see below).
- Press Save Contact.

7.2.1 Scanning a business card
For a new contact, the AI Smart Scan section reads a business card for you:
- Press Scan Card and choose a photo or a PDF of the card.
- Wait while JetLogix shows Extracting....
- Check the details that were filled in and correct them if needed.
7.2.2 Role in shipments (customer book)
In the section Shipments (customer book) choose how the contact is offered in the shipment form:
| Role | Offered as |
|---|---|
| Not in shipments | Not offered. |
| Customer | Consignee of outgoing shipments. |
| Supplier | Shipper of incoming shipments. |
| Customer & supplier | Both. |
Short name in file names on the network folder is the short name used in the file names of Geniki vouchers and PODs, for example Egnatia (up to 40 characters).
7.2.3 Delivery addresses
A contact can have several delivery addresses, for example a head office and a warehouse. Shipments and Geniki vouchers take the address from here.
- Press Add address.
- Fill in the Address name (for example Athens office), Street and number, Post code, City, country, Attention (person), Telephone and Remarks (for example opening hours).
- Click the star to make the address the default one.
Press the bin of an address to remove it.
7.2.4 Photo and business card
Add a Profile Photo / Logo and both sides of the Business Card, either as a file (picture or PDF, up to 2 MB) or as a link. Press View Business Card in the list to see the card.
7.3 Importing customers from Excel
Customers can be imported from an Excel (.xlsx) or CSV file, for example the client list exported from Geniki's program.
- Press Import in the Contact Directory.
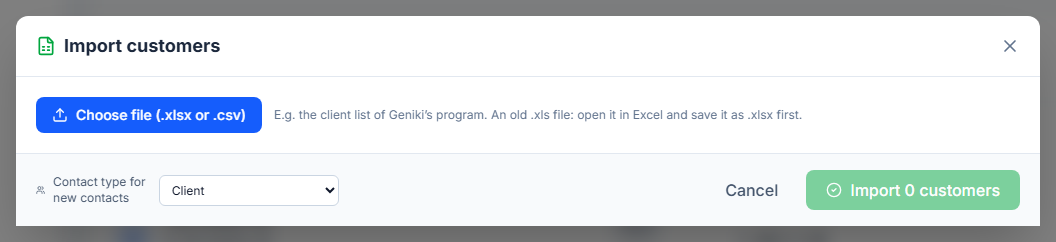
- Press Choose file (.xlsx or .csv) and choose the file.
.xls) must first be opened in Excel and saved as .xlsx.- Under Columns of the file, check which column holds which information (name / company, street, city, post code, telephone, e-mail, country, short name, remarks). JetLogix guesses them from the column titles; choose (not imported) for columns you do not need.
- Check the summary and the tabs:
| Tab | Content |
|---|---|
| New | Customers that are not yet in Contacts. |
| Already in Contacts | Existing contacts; only their new addresses are added. |
| Possible duplicates | Pairs that look like the same company (same name in Greek and Latin letters, similar names, same telephone). Tick the pairs to merge. |
| Check | Rows with post code problems (missing, or the wrong number of digits for the country). |
- Choose the Contact type for new contacts.
- Press Import N customers and confirm.
7.4 Exporting the contacts
Press Export and choose Export to Excel (CSV) or Export to PDF (Contact Directory Report). The export contains the contacts shown in the list.